How to use the Pickle*Pusher fermenting weight kits:
A fermenting weight replacement system is exactly what the Pickle*Pusher is ! You have purchased the very well made small batch fermenting kit based complete with the Pickle*Pusher “weightless” fermenting weight replacement and need to know how to use it!
Your 3-Pack Pickle*Pusher fermenting kit should contain:
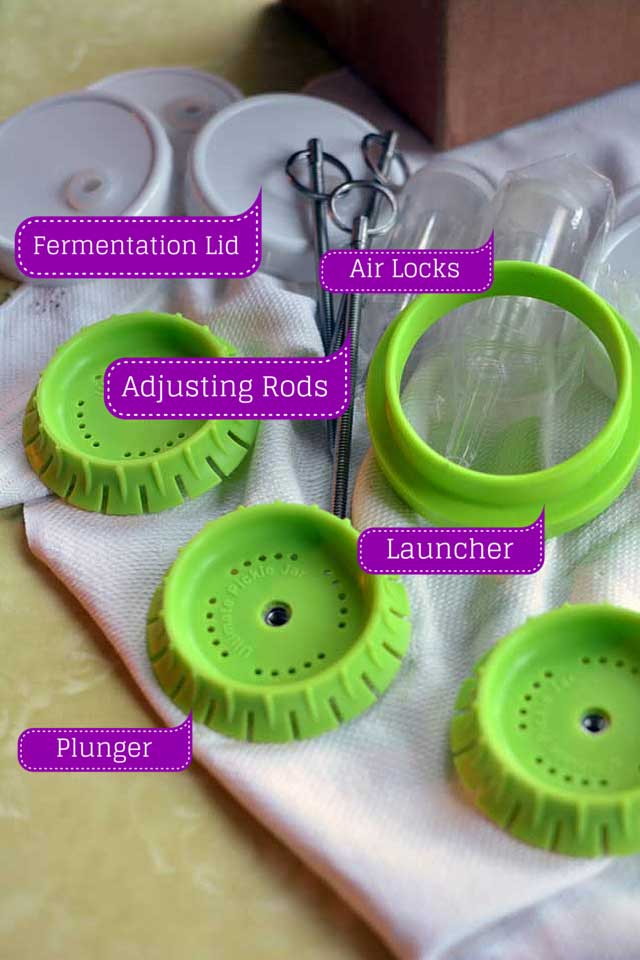
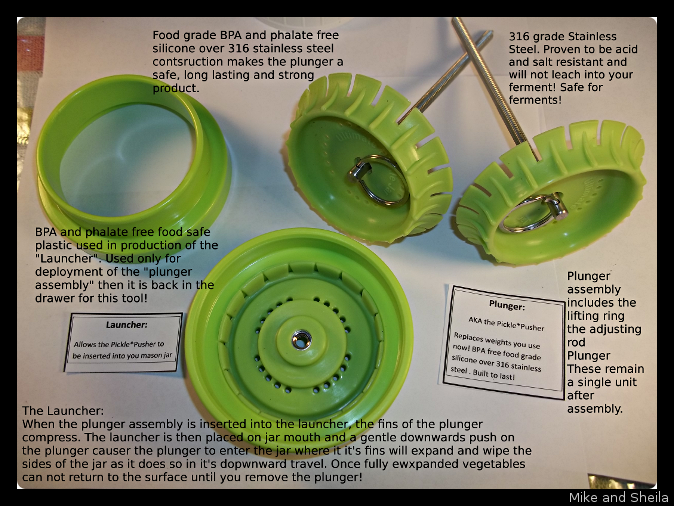
- 1 launcher [ made of FDA foodsafe BPA / phalate free plastic which does not contact your foodstuffs!]
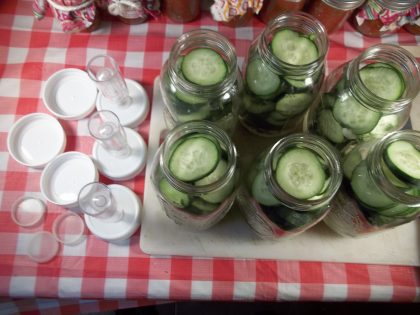
- 6 plastic storage lids. 3 will be drilled and 3 will not be drilled. [BPA free and Food safe plastic]
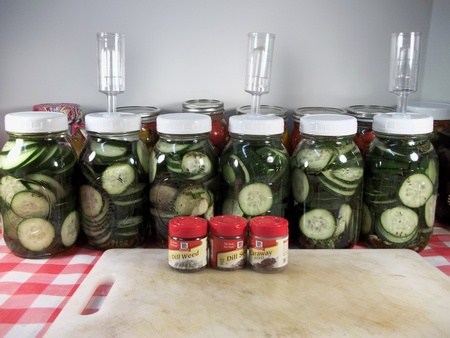
- 3 3-piece airlocks. These are the traditional water-filled airlocks [ high quality BPA free, FDA foodsafe plastic]
- 6 heavy duty [FDA grade BPA free silicone]
- gaskets3 heavy duty grommets that will accept a 3/8 airlock [FDA grade BPA free silicone]
- 3 Pickle*Pusher fermenting weight replacements made of FDA grade BPA free silicone and 316 stainless steel [which is proven to be FDA food grade and will not harm the ferment]to withstand the acid and salt environment of the fermenting jar.
- 3 adjusting rods and 3 rings. All parts made of acid and salt resistant 316 grade stainless steel now widely accepted and will not harm your ferment!
- 1 instruction booklet NEWLY REVISED!
- Business cards from selected recipe sites that offer aid and share knowledge with our customers. Like Miss Holly Howe of MakeSauerKraut
Preliminary Assembly:
- Remove the launcher, adjusting rods , rings and plungers from the shipping box and set aside as it requires no assembly.
- Add one adjusting rod per fermenting weight replacing plunger by inserting the free pointed end into the side of the plunger that does not have “fins”. Adjust all the way down until you run out of threads or the ring prevents you going any farther.
- Set this pre assembly aside until later.
Setting the height of plunger correctly to fit your jar:
- Place your launcher on the counter top with the narrow side downwards.
- Place 1 plunger assembly into the launcher with the ring end going towards the counter top. This will compress the “fins” and allow it to fit into the jar mouth.
- Pick up your “loaded” launcher and place on a quart wide mouth mason jar or equivalent.
- Give the ring a push causing the whole plunger assembly to travel downwards into the jar mouth. When the rod hits the bottom of the jar, the fins on the plunger should have fully opened and be contacting the jar’s sides.
- Adjust the rod to where the plunger is hard pressed to the very uppermost region of the jar just before it starts to narrow into the throat. The rod allows the plunger to stay there without having to rely on the contents to achieve this as is the case with glass weights!
Assembling your fermenting lids and airlocks:
- Remove the airlocks from their bag. Remove each cap to remove the plastic shipping wrap inside. Set these aside until after you have packed your jars with contents and deployed and adjusted your plunger assemblies.
- Place 1 gasket in each of the 6 lids.
- Set the 3 lids with no holes aside. These will be used after the fermenting is completed and will replace the 3 drilled or fermentation lids so you can start another batch.
- Place 1 grommet and 1 gasket into the 3 remaining drilled lids.
- Place 1 airlock into the top of a drilled lid’s grommet and allow it to go thru until 1/8″ is past the inside the grommet. Going any farther could cause a problem later.
- Place the “bowl” part of the airlock into the reservoir part and fill to “Full” line then place cap on and set aside.
Final instructions and tips:
- At this point set everything aside until you have packed your jars with contents.
- Once you are finished preparing your fermenting jars, place a loaded launcher on one of the jars. Deploy fully and at this point you should adjust your rod until the plunger is as close to the jar shoulder as possible by holding on to the ring and turning the plunger.
With some vegetables it may be harder to adjust than with others.
- Once you are satisfied that the plunger is adjusted to the best possible height, add water to cover the plunger but no closer than 1/2″ from the jar top.
- Silicone does not allow growth of molds or bacteria on it as does plastic! In the early stages of an active ferment, you can use less water to partially cover the plunger as there will be a rise in liquids at that point.
- Place a fermenting lid [ the one with the airlock ] on the jar and tighten firmly.
How the Pickle*Pusher Fermenting weight replacement system works!
We specially designed our plunger with the fins set to a 45° angle. When installed into the launcher , the fins change their angle to match that of the launcher which is a 90° angle. This allows them to slide into the jar mouth. As the fins leave the launcher with a gentle push from you, they wipe the jar sides free of contents and floaties as they expand back to their original 45° angle! The Pickle*Pusher is now in it’s “Sweet spot” and will stay there without having to rely on the jar contents. You will find this invaluable when doing ferments like salsa especially! A glass weight will sink under these conditions. Once deployed they will hold over 4½ pounds of pressure on your contents as witnessed in the video below using the ½ gallon mason jar full of sauerkraut and brine shows! The contents alone are over 4 pounds!
“Can your weight do that???? I bet it can’t!”
No fermenting weights! Super control over floaties! Super easy cleanup of skim and mold! Extended shelf life of your goods!
You can follow us on Facebook , Twitter and our website and join the mailing list where possible to be updated on new sales dates , discount codes and product launchs.
[auction-nudge tool=”listings”]