
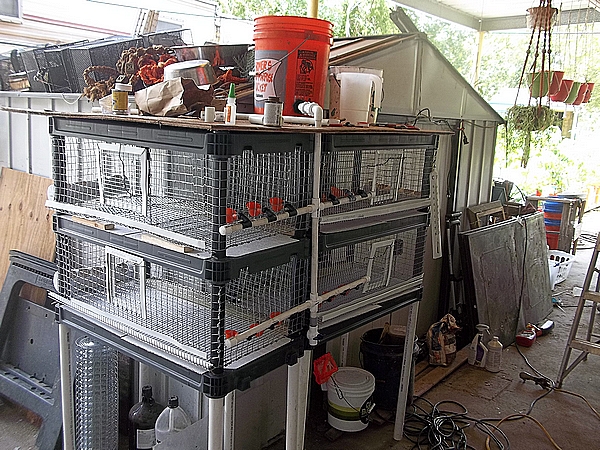
DIY quail pen plan using pre-made shelving system:
Here we give you our take on a complete balcony/porch/garage DIY quail pen plan using pre-made shelving system for breeders , layers and even for brooders. It is designed to last a long time and be pretty well self running. We have seen plans for units made of PVC and the sittings for joining the PVC are pretty high. We used a ready made shelf system from Walmart.
- There in very little possibility of rotting
- Easy to build. Few special tools needed.
- Simple to run once set up
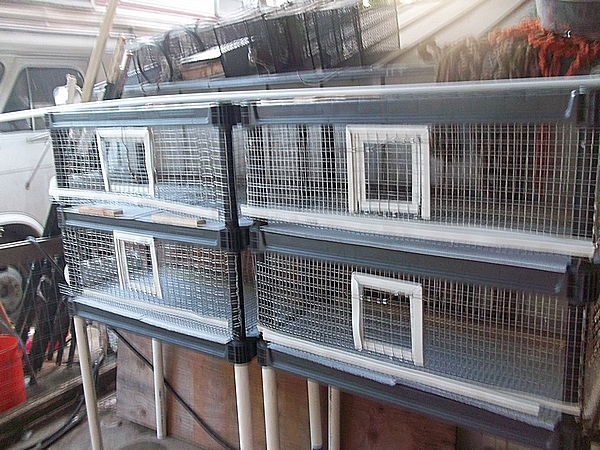
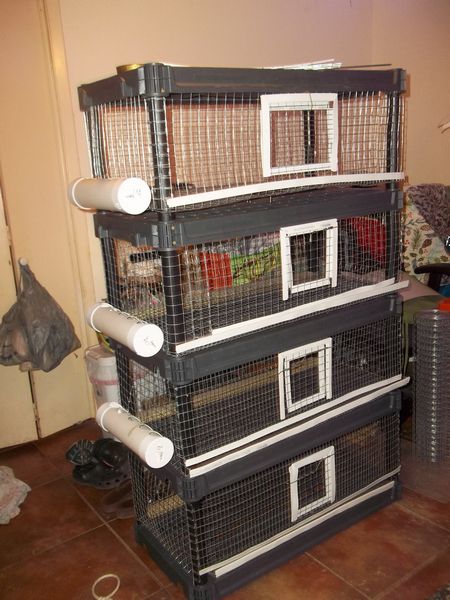
- Makes a 4 tier breeder/ cage system. Our pens are 10″ tall.
- Instructions include plans for waste-less feeders and automatic water system
- Has sliding “poop” trays for easy odor free removal
For this project we used:
- 1 shelf system from Walmart [ $35 ]
- 1 roll 1″x1/2″ x 10′ welded wire [$25 ]
- 1 roll 1″x1″ X 16 welded wire [$25 ]
- j-clips [lots of them.. at least 1 pound ] [$6 ]
- 30′ Edge trim [ for sharp edges of egg tray and doors ]
- 3″ pvc pipe [for feeders. You can use knock-out caps if you can find them ]
- 3″end caps for pvc pipe [ for feeders ]
- 1 sheet 4’x8′ cheap paneling [ for poop trays ]
- 2″x2″ wood strips [ for bottom wire support ]
- 1 8′ 1″x2″ wood strip for poop tray handles
- 10′ 1/2″ PVC pipe [ for water system]
- 1 5-gallon bucket [ for water system]
- 2 4way 1/2″ PVC fittings [ for water system]
- 4 1/2″ end caps for 1/2″ PVC pipe [ for water system]
- 1 90 degree elbow 1/2″ PVC fitting [ for water system]
- 1 1/2″ bulkhead fitting [ to connect bucket to pipe]
- 1 1/2″ removable union [ for water system]
Tools needed:
- a good comfortable wire cutting tool!
- J-clip tool
- 2″ hole saw [for feeders]
- hack saw
- ruler or measuring tape
- power drill
Walmart Shelf System we used:
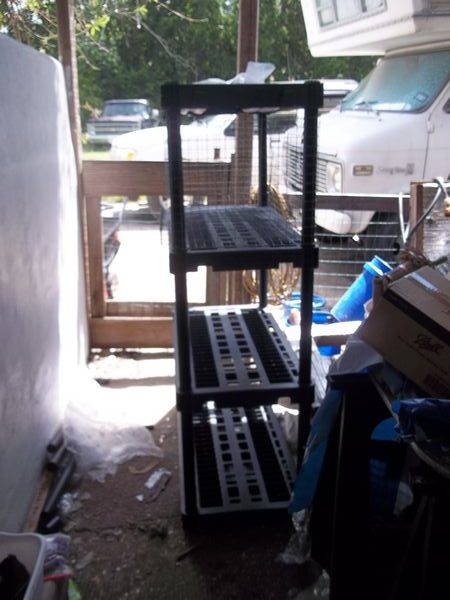
All molded plastic and easy to assemble instructions included. Price was $35 when we bought it. Seems almost made with our purpose in mind!
General Layout: Bottom panel
STEP 1: Lay out the bottom panel. Make sure it is flattened out.
SPECIAL NOTE: Also note that the wire that runs front to back should be"on top of" the sideways running wire to allow eggs to travel to collecting trough!
This shows the bottom layout and cutouts. Make sure to pre flatten your wire. Also note the direction of the bottom wire. SPECIAL NOTE: The wire that runs from front to back of the bottom wire MUST be placed as shown with the wires running front to back on top of the wire running side to side or the eggs will not roll!
 STEP 2: Cut the front corner cutouts: On front side of the bottom panel make corner cutout shown here.  This will allow corners to be stronger.


This is the front bottom corner cutout. You will bend the short part to form the egg catching tray. NOTE: You can stop wire at the top of the cutout OR fold it over a few spaces for added strength
STEP 3: Cut the back corner cutouts: On the back side of the panel, make the cutout shown here. Do not attach side wire to the single wire left after making the cutout shown here. You will want to bend the side wire around the corner pipe tightly.
This is the cutout for the bottom back corner of the pen. NOTE: do not attach side wire to the single wire left on outside of the cutout. You will want to bend the wire hard against the corner tube
General Layout: Side and Front Panel
STEP 1: Making the side wire panel:
1] Cut the wire as tall as you want the pen. We went 11"
2] Cut the wire from your roll across the edge of the roll to avoid waste.
3] Cut enough to reach all the way around the entire floor keeping in mind to stretch the wire tightly at corners to help keep wire tight. You can trim wire a square or so when making final joining.
STEP 2: Attaching the side to the floor:
  1] Once bottom panel is cut and joined, start adding side wire to the bottom panel starting 2" from the edge of the egg tray as shown below. You will leave 1" on the front edge of the bottom to bend upwards later to form the egg tray.


  SPECIAL NOTE: IT IS BETTER TO START THE WIRE 4" PAST THE CORNER AS SHOWN BELOW. BEND AROUND THE CORNER AND CONTINUE TO ADD WIRE FOR THE FRONT. THEN TRIM 1" FOR EGG SLOT!!!!! IT MAKES IT A LOT EASIER AS USING THE METHOD SHOWN IN THE PICTURE BELOW ALLOWS THE WIRE TO SLIDE DOWN!!!

SPECIAL NOTE: Details of the end of the egg tray. It will have trim installed on all sharp edges when finished. NOTE: Make sure your bottom 1x2 wire is running in the direction in picture WITH the wires running front to back ON TOP> Otherwise eggs will not roll!
Sheila has worked the side wire almost half way around the bottom panel as quick as I could cut her more side wire to clip on! Start anywhere adding the sides to the bottom but pay attention to the corners and the front where egg tray will be formed later.
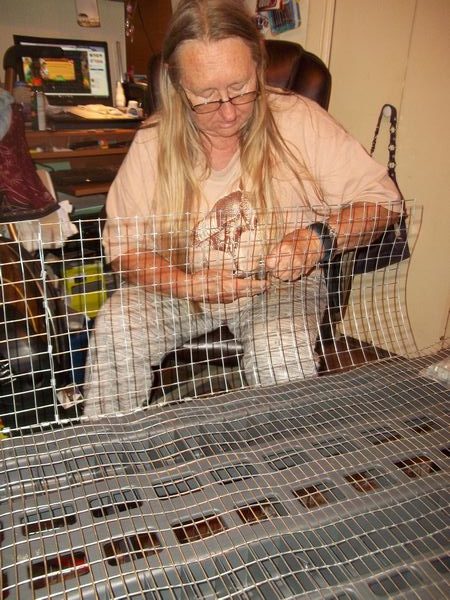
Sheila connecting all the wire as I was cutting it. A sharp pair of wire dykes is a must! Also a "J-clip" tool.
Make sure to flatten your wire more than we did here as it is easier now than later!
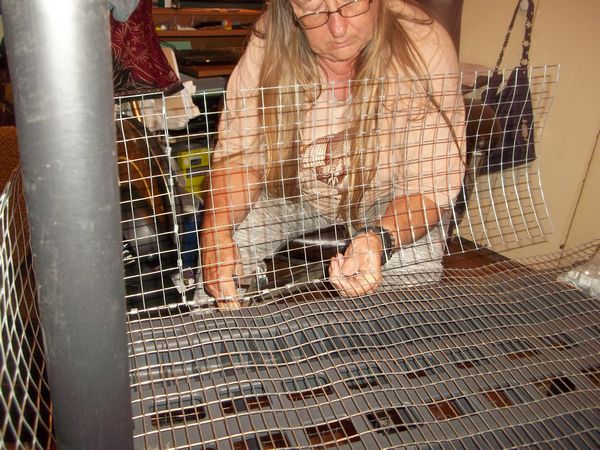
TIP: Flatten your wire before connecting! Makes things a lot easier later on!
You can use some really small upholstery clips or hog rings as well as the J-clip pliers. There are some automatic feed hog ring pliers that we may check on but they will need some modifications to hold the rings tighter than they currently do.
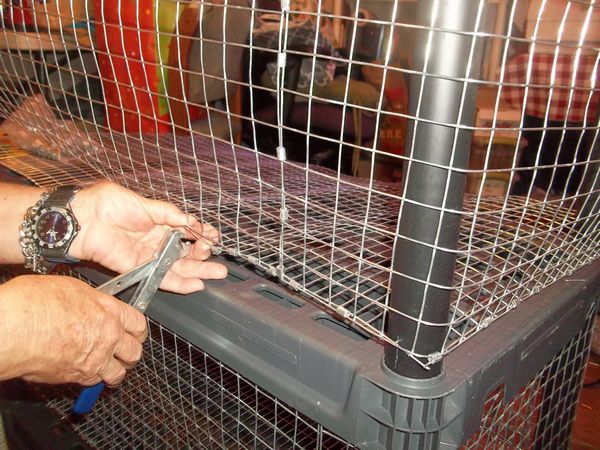
Using the "J-clip" tool has a learning curve. Place the wires to be joined in the "J" [bent] side of the clip and then press to deploy them correctly.
It goes really fast once you understand the procedure! There is a new tool out that would work great with a small grinding on the tool face to get tighter crimp. It is Dewalt P7DW Hog Ring Plier and Ring Kit
SPECIAL NOTE: Here is a closeup of the back corner bottom showing the wrapping technique used to get tighter stretch of side wire. DO NOT attach side wire to the single wires left after making the corner cutout!
Closeup of bottom back corner cutout for the quail pen. The rod is used to level the cage at final installation. It works well and holds almost no "poop" compared to the 2"x2" used on back and front of cage.
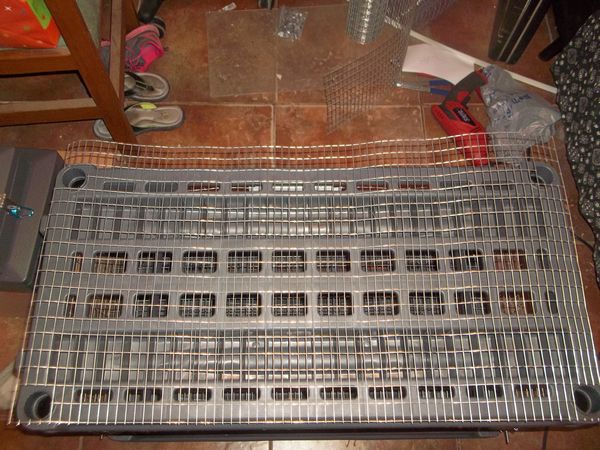
Wire all secured and joined. It is now ready to be trimmed to allow it to be inserted into the slots in the bottom of the shelves. Disregard the extra square on the left side of the front panel by the corner tubing.Wire ready to be trimmed to fit into the top shelf groove
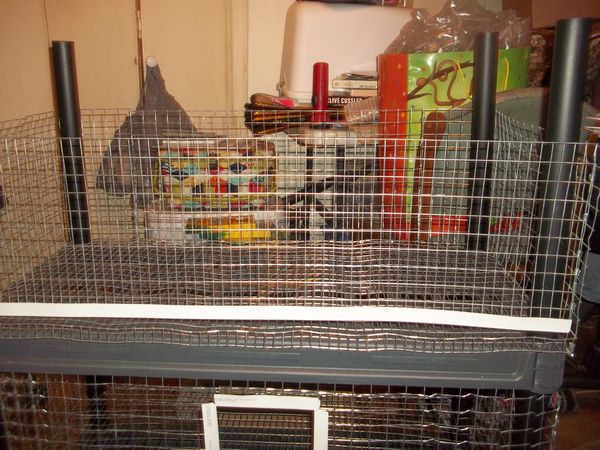
Step 3: Installing the “poop tray”:
Our DIY quail pen plan is easily adapted to any shelving system. Regardless of the frame, one requirement is sanitation! Also the manure is so good for your garden. Especially our bucket garden!
- Take a 2″ x 2″ or a 1″ x 2″ and lay the 2″ side down.
- Using a 2″ hole saw, center the bit on the wood and drill all the way through.
- Measure 31 3/4″ to the closest point on a circle drawn using the 2″ hole saw and again drill.
Corner details for back floor brace:
This brace does not reach the floor but sits on the collar as shown. You will run a screw through the tubing into the end of the wood to assist in it staying in place [ we did not use this wood as it was not needed! ]
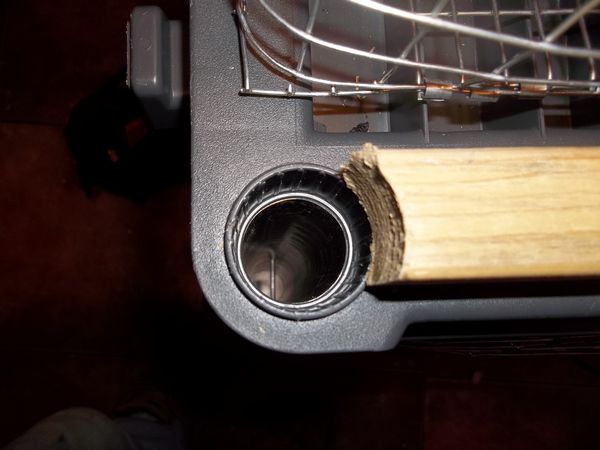
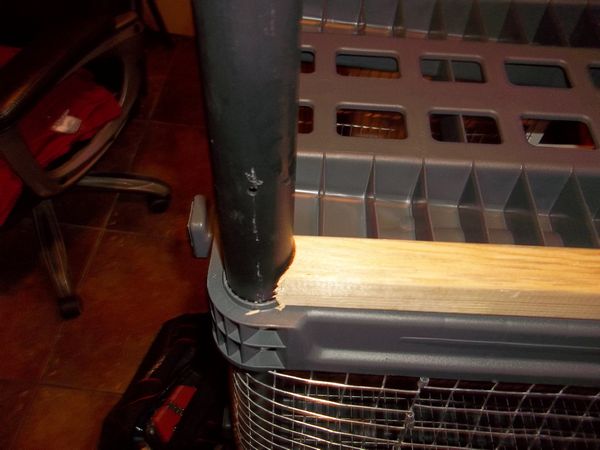
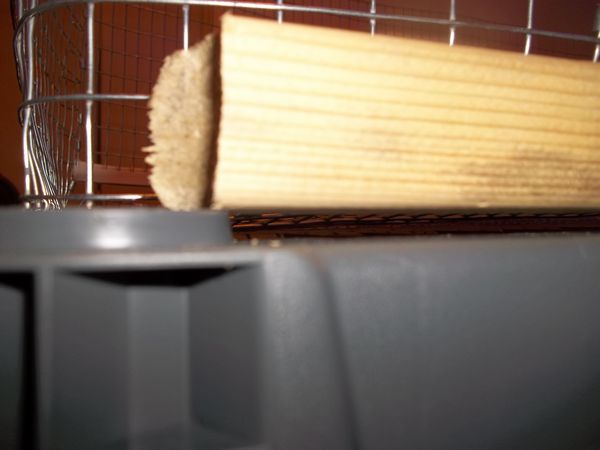
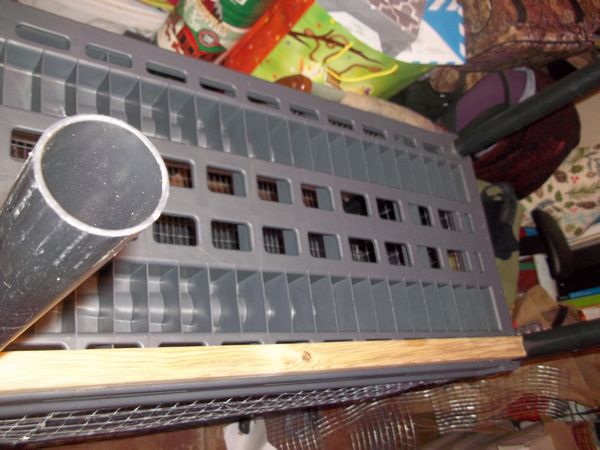
This will result in a bottom for our pen to sit on. Note that the wood will not sit directly on the shelf! This is to allow the tray to slide under it
CONSTRUCTION TIP: The "Poop" tray will have a wood piece attached to it both to stiffen the tray AND to stiffen the wire
Step 4: Adjusting tubing height:
Our DIY quail pen plan is easy to alter to fit your needs. We used 11″ of wire for our pens. We had to cut 3 1/2″ off the tubing on each level.
Adapting your choice of height to our DIY quail pen plan requires you to keep the following variables in mind:
- Height of your wood
- Height of your wire
- Depth the tubing goes into the shelf itself
- How much wire will be inside the groove in the shelf bottom
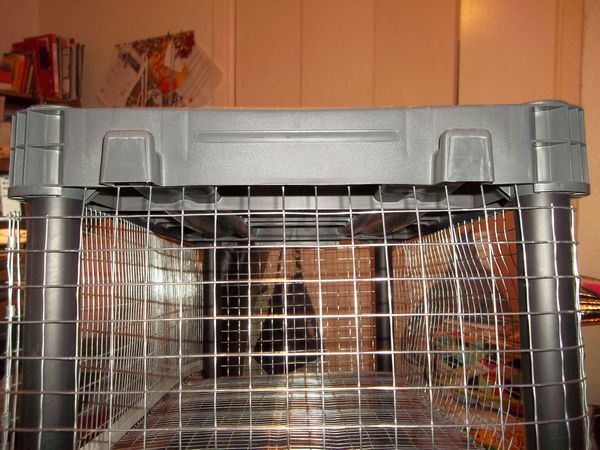
Step 5: Installing the top:
- Once all sides and front are attached to the bottom, we will trim the corners to fit into the groove made into the shelf bottom. The corners of the shelves do not have the slots and the wire needs to be trimmed 1″ to allow the wire to fit properly.
- Place wire on tubing and press down to even out the wire. Make any last minute flattening to wire now
- Place shelf on tubing and work wire into slot in bottom of shelf as you push shelf downwards. It is best to work one end down then across the back and then leave front until last.
- Once all wire is in place you can use a small large-headed self tapping screw to hold wire in place and keep it from falling down until corner supports are in place.
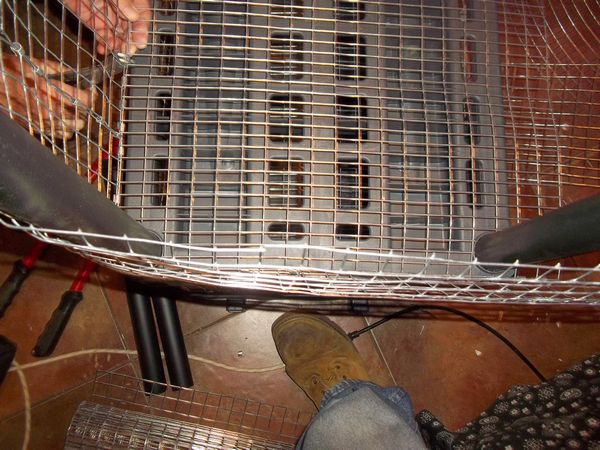
SPECIAL NOTE: LEAVE WHOLE SQUARES , NOT LONG WIRES LIKE THIS PICTURES SEEMS TO BE SHOWING! You will be hiding 1 square into the bottom of the top shelf which will hold wire steady and prevent escape.
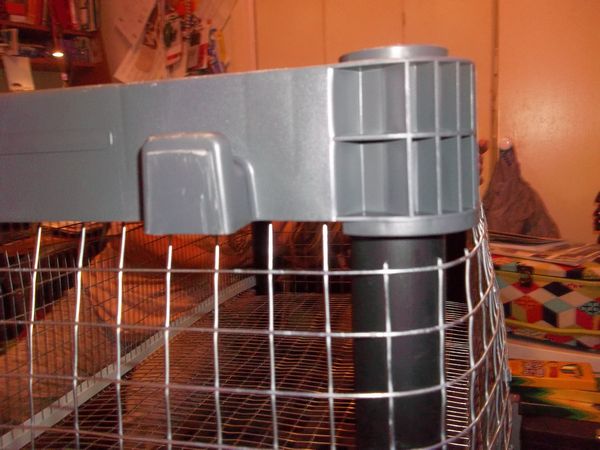
Top corner shows cutout to allow the wire to insert into the slots in the shelves. LEAVE WHOLE SQUARES , NOT LONG WIRES LIKE THIS PICTURES SEEMS TO BE SHOWING!
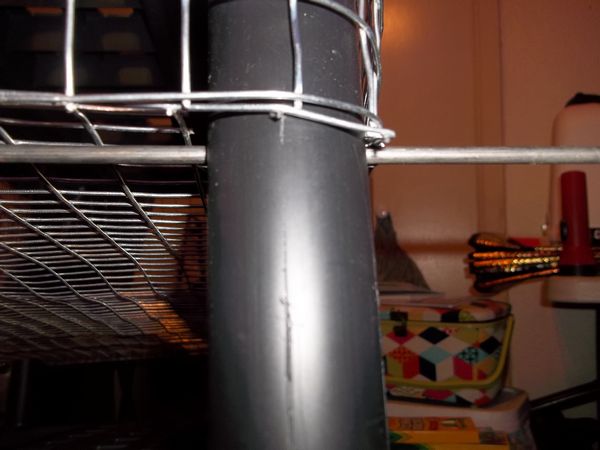
This photo shows the molded in groove in the shelf bottom that we use to secure the wire to the shelf. No need to worry about this until all sides and front are installed.
SPECIAL CONSTRUCTION TIP: You will see that the ends do not have the groove. The short distance will not allow escape of the birds if it is tucked in as shown.
Here is completed end showing proper placement of wire. It still has about 3/8" further to go down as back and front wire is not fully in the groove in the underside of the "roof" shelf
Step 6: The Poop Tray:
We will use a 1″ x 2″ wood strip nailed to a sheet of painted cheap paneling for our tray. The wood will help catch and support the bottom front wire if it tries to sag at a later date. It will also stiffen the painted paneling as well. It will fit under the wood at the back of the pen bottom.
SPECIAL NOTE: We had planned for a single poop trap but to cover the high traffic ends [ especially the feeder end ] we will use a split tray
Step 7: Final leveling and fancying:
Once everything is positioned correctly, you will need to fasten them permanently:
- Add a screw into every top or bottom of the tubing.
- Add 1 screw into each end of the back bottom wood brace
- Add the wire rod to the front corner of bottom so that the bottom sits flush on the 1″ x 2″ poop tray brace
Waste Less Feeders:
In our version of the DIY quail pen plan, we made ours 13″ so they would fit between the corner tubing on the outside of the pens. We used the recommended 2″ holes placed evenly on the top of the pipe. At this point we will wire tie them in place until we see how an actual bird will “work” to get the feed out and hard attach them when we find the angle that reduces waste the most. Made from 3″ PVC. We decided to use a long continuous slot instead of holes.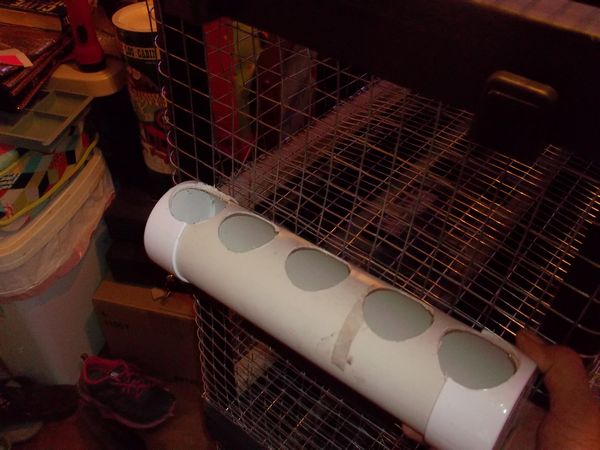
Automatic water system:
No DIY quail pen plan is complete without an automatic water system. We have 2 types to use. 1 uses an on-demand trigger and the other uses a float valve which allows more water to stay in the cup. Both are super low pressure and we plan to rig a 5 gallon bucket sitting on top of the battery to supply water to the system.
The waterers are the on demand type. We may change them to a float type later
 We added a coupling to the pipes for easy removal of bucket and a drain valve to make flushing easier.
ADDING TRIM: Reduces harmful scratches:
NOTE: The trim can be hot glued or even stapled.
Add to the bottom of the front panel and to the top edge of the egg tray. Work it around the door opening and the door itself!
Pen Configuration Ideas:
We were going to stack all 4 but the bottom one would have been a killer to tend to AND varmint paradise! SO we changed them up a bit.
If you need additional information, post a comment and we will get right back to you!~

Pingback: Raising Quail for food , enjoyment or profit ⋆ SS Prepper