
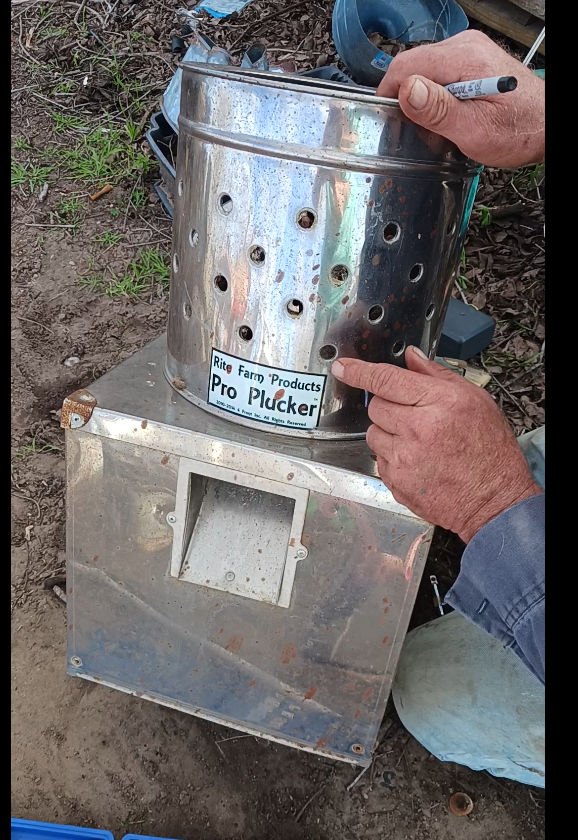
Changing the Fingers in a Rite Farm Small Chicken Plucking Machine
Changing the Fingers in a Rite Farm Small Chicken Plucking Machine can be a nightmare if you do not know how! We are very thankful to own a Rite Farm small chicken plucking machine. It can handle 4-6 quail at a time or 1 small bantam chicken and takes ALL the feathers off the bird in less than a minute! It even removes the wing feathers!
But after a long year of house repairs/improvements , the heat of the summer and job related commitments finally became a thing of the past and we had time to re-claim our chicken yard, we found the “fingers” on our plucker were deteriorated past being useful. We rounded up as many tools as we could on short notice and googled how to do the job……………
Google was a “no-help” which was not what we wanted with 30+ roosters to process! So with the few tools I could muster, I tackled the chore and got surprisingly lucky! I had a 1/4″ ratchet, a 15/32 socket, a Phillips-head screwdriver, a 10MM box-end wrench, a pair of rusty channel-lock pliers and thankfully 2 brand-new small vice-grip pliers. Not much but the rest of the tools are in Sheila’s truck which is in the shop or covered in dust in a badly designed, non-dust-free zone in the barn or in the attic under a load of other things temporarily moved to allow remodeling in house to be done!
Being a redneck with perseverance has it’s benefits.. Today I did not fail myself in that area! I took apart what I thought I needed only to find all I really needed to remove was one little screw in the middle of the spinner plate! It took about 2 hours to get to that point and a lesser man would have given up! I didn’t and made a quick video to share 🙂
How to actually do the repairs:
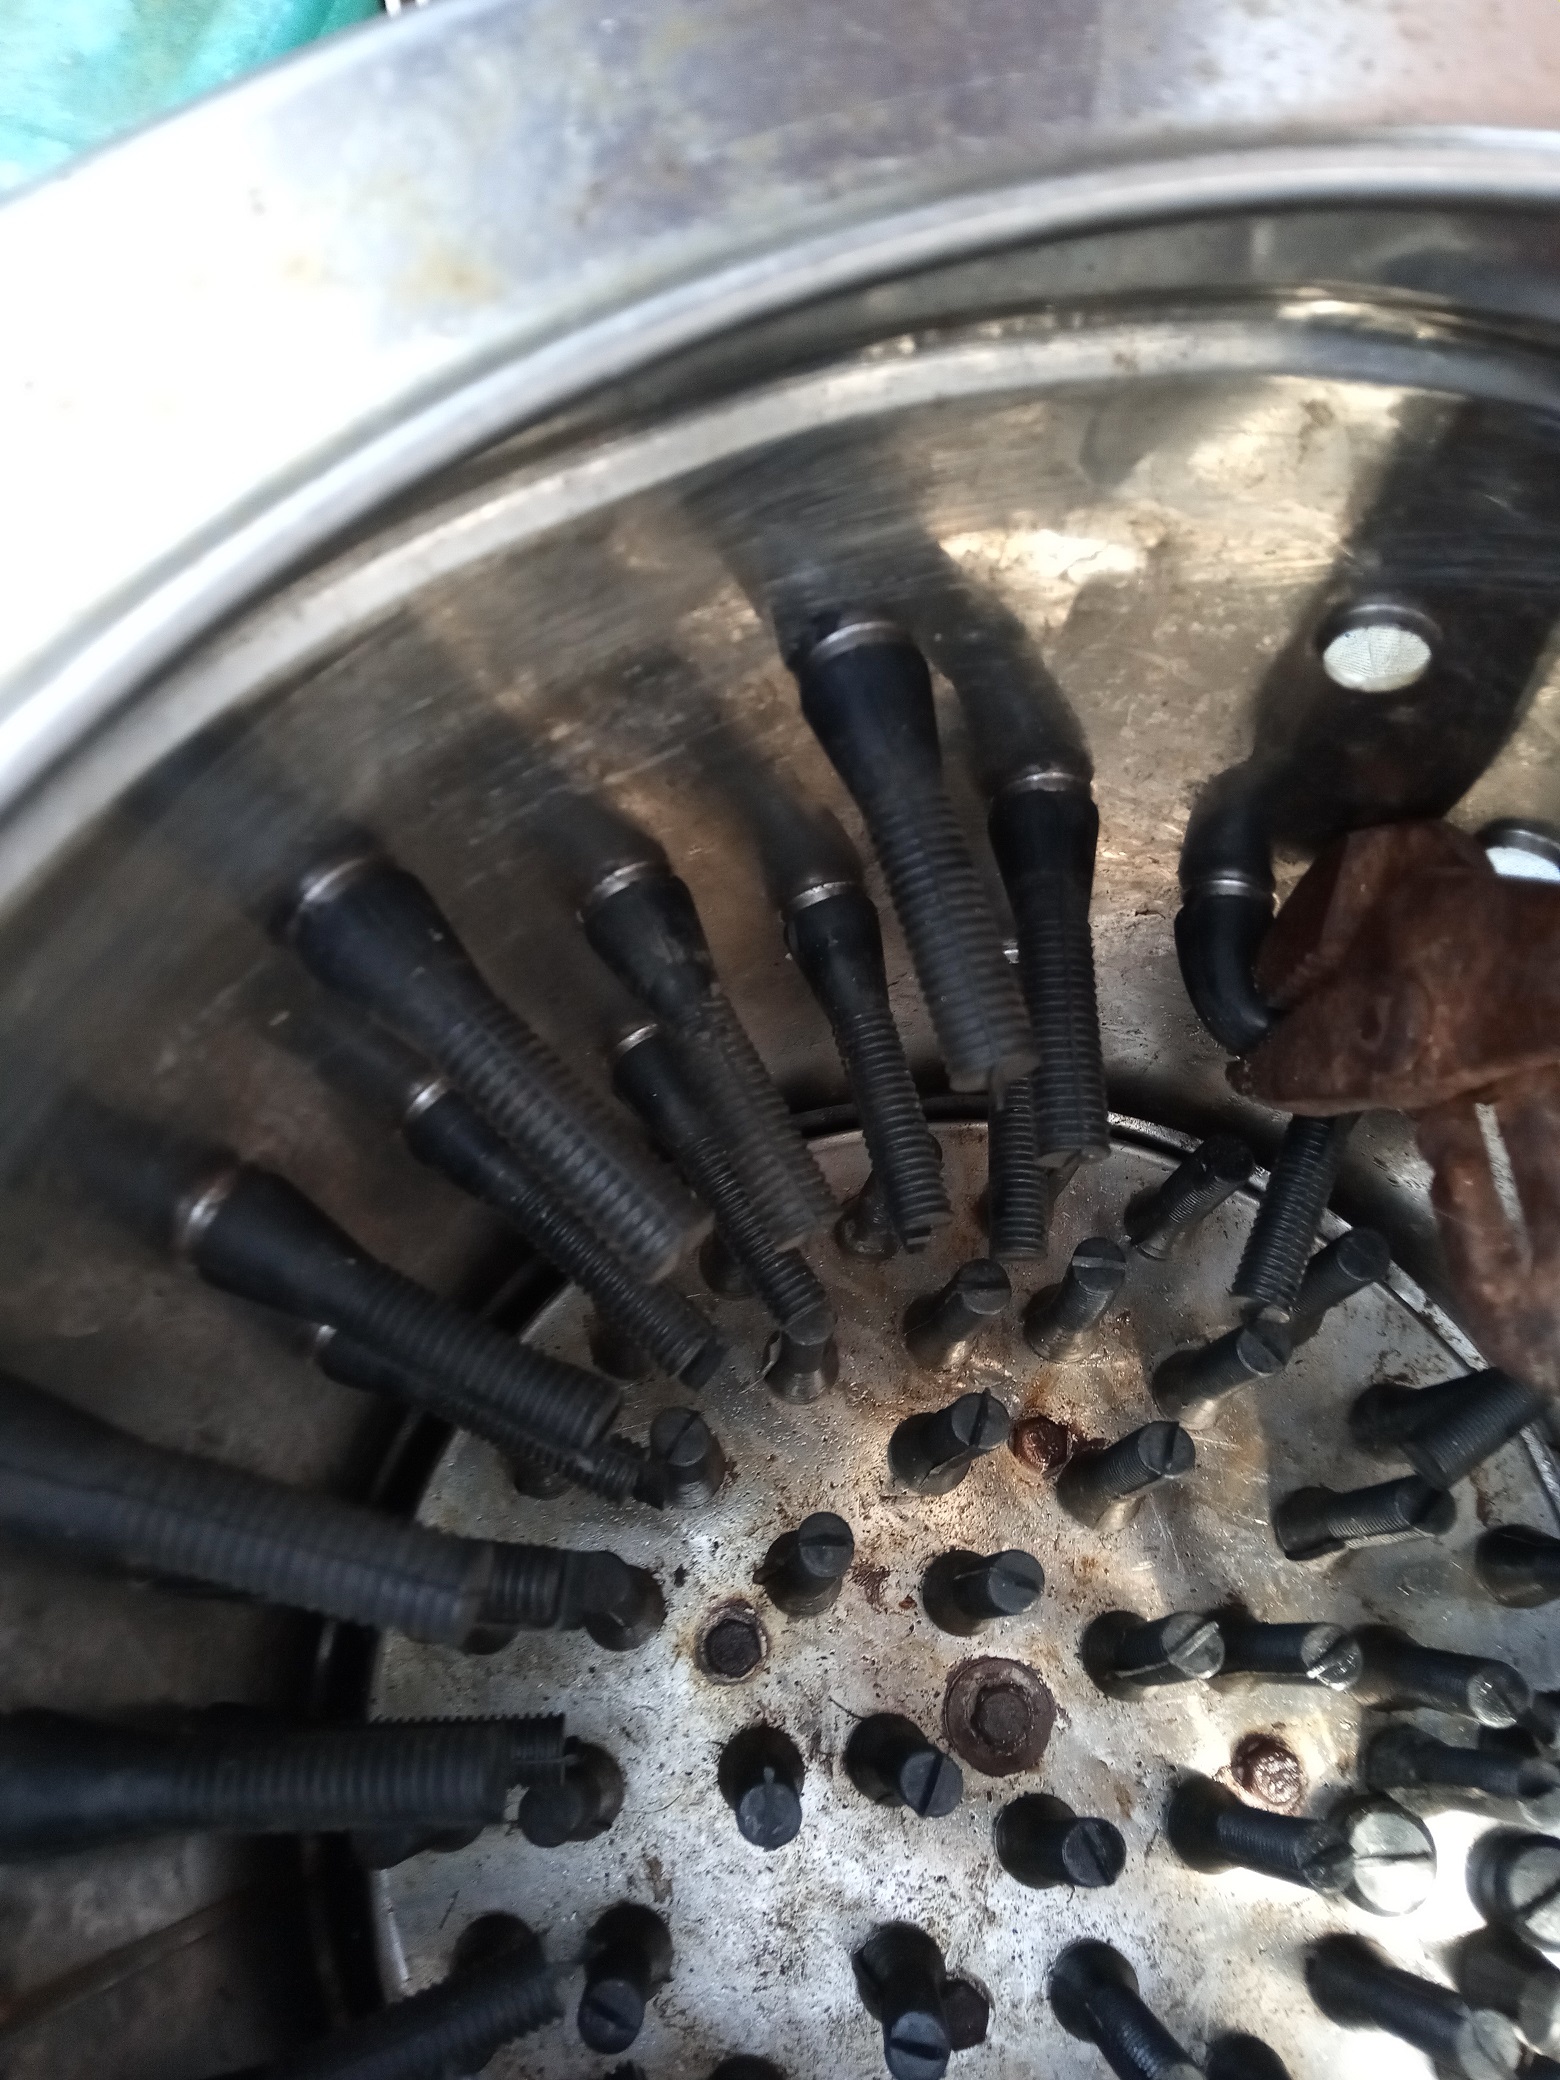
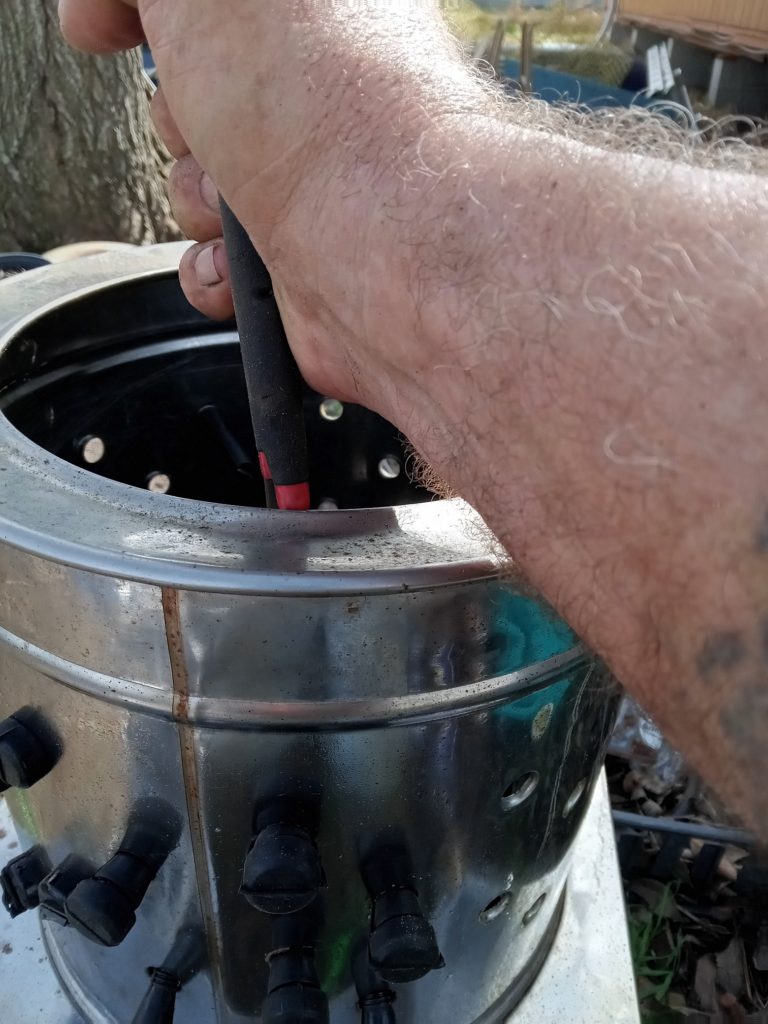
It was really a super short chore to access the spinner plate to remove it and gain access to the finger holes.
1] Remove the center bolt on the plate using a few extensions and a 3/8″ or 15/32″ socket.
2] Flip the machine over and bump it a few times to loosen the plate. It will drop out fairly easy.
3] Turn the plate on it’s side and remove the 4 bolts using fore-used tools. At this point I used the pair of vice grips to hold the plate towards the top of the drum by clamping them to plate while holding plate up in drum as far as it would go. When you remove a bolt, simply loosen one grip , rotate the plate and refasten again.
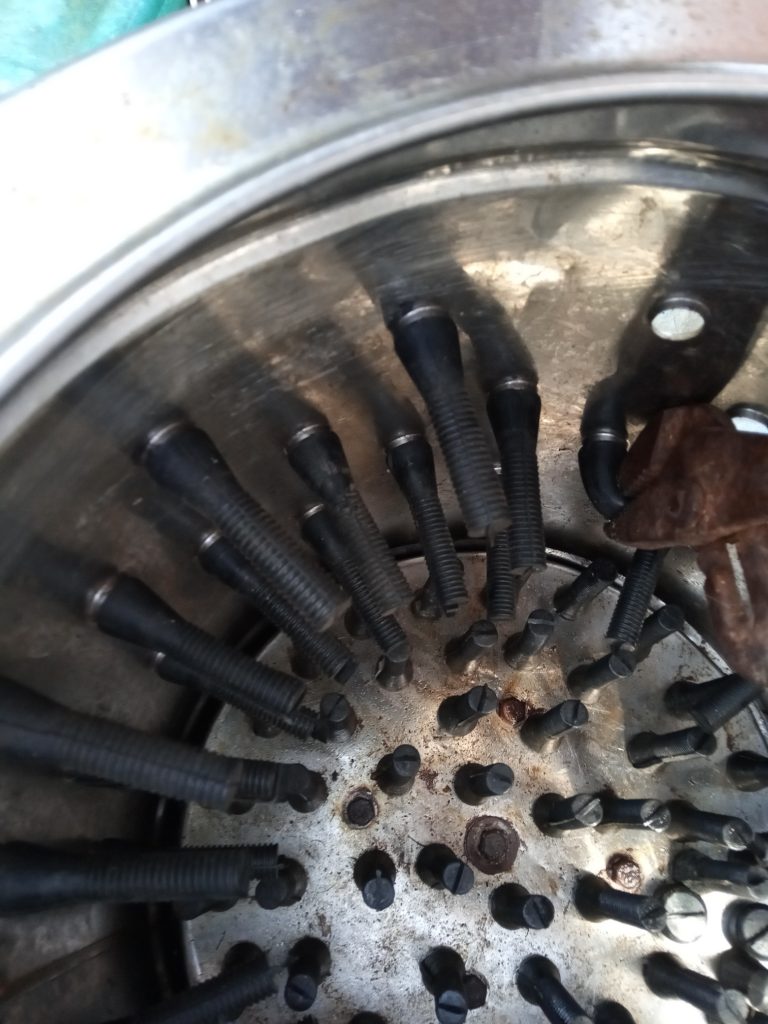
4] Once the 4 bolts are out, you can start cutting the old fingers out with one of the best available serrated edge knives your wife has, Choose a good one and run! On our machine there was 2 fingers that pointed down instead of upwards and they were placed that way to help clean the feather discharge chute. YOU SHOULD MARK THE PLATE WHERE THESE 2 FINGERS ARE TO GO WHEN REPLACED!
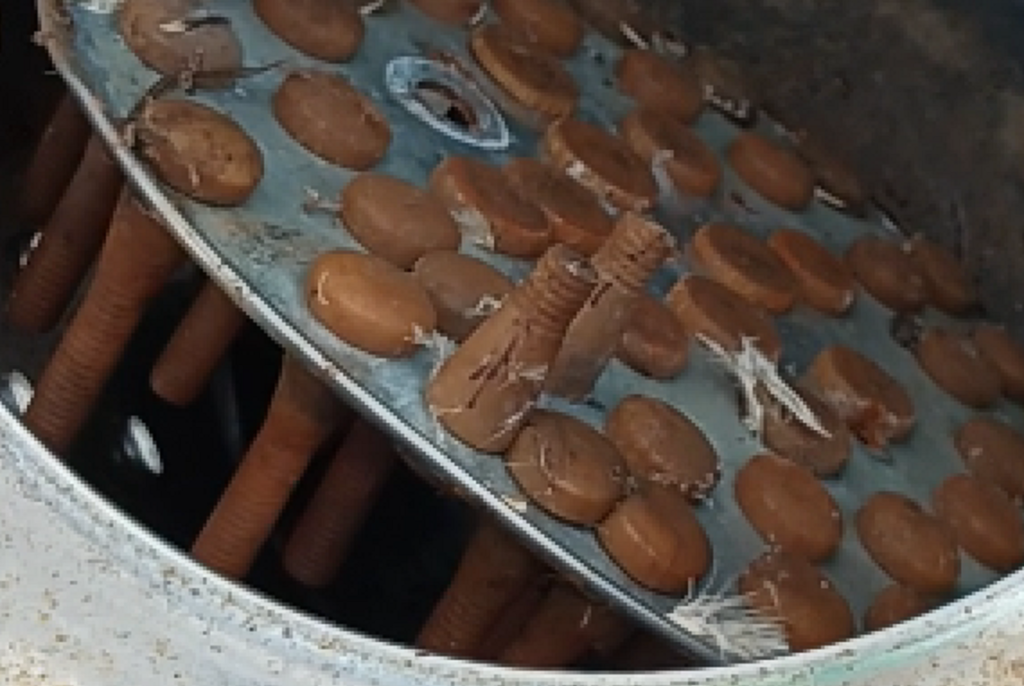
5] Replacing the fingers call for a good set of channel lock pliers and a lubricant. Being somewhat old school and having 67 years of building natural immunity, I opted for the old can of WD-40. Probable Vaseline or mineral oil would be safer but the main thing is not to get it on the part you will pull with the pliers. We started out spraying each one but there is a LOT of fingers 🙂 Start adding fingers in the middle ONLY in the area that the bottom plate will cover!
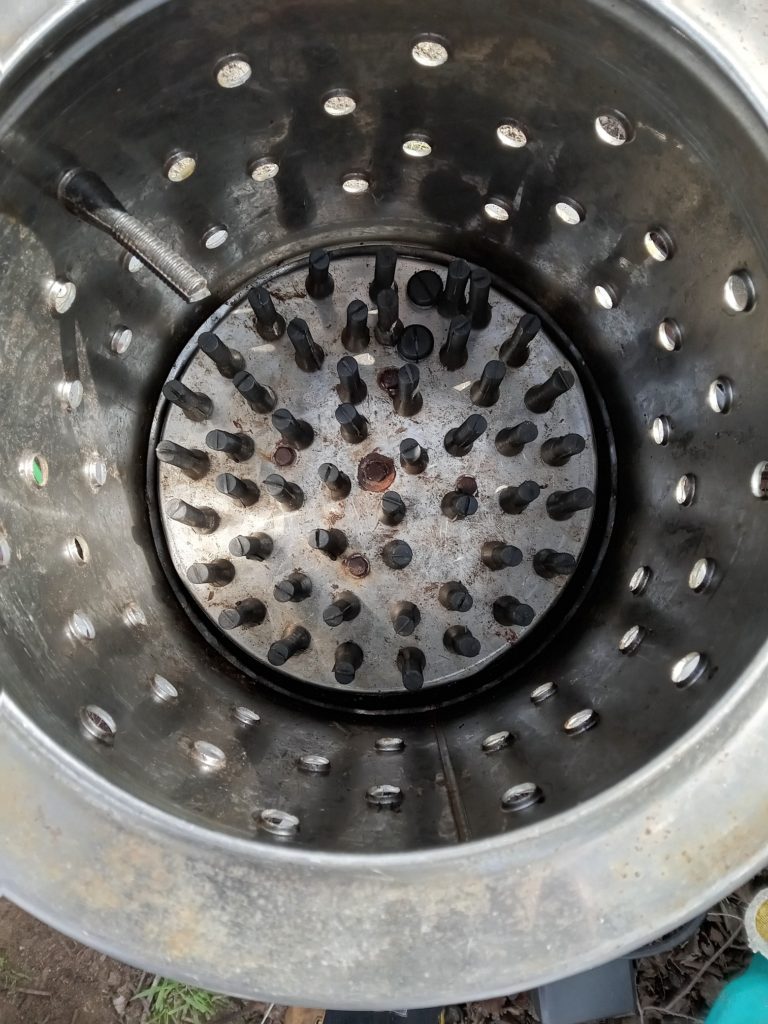
6] Once you have the center rings of fingers installed, it is time to add the 4 bolts to the plate and tighten enough to compress the heads of the fingers that it will cover all the while keeping the hole in the middle of the spinner plate lined up with the hole in the mounting plate. It actually was easier than I thought. Use the vise-grip trick explained above to ease access to the plate while installing fingers and bolts.
7] Once the plate is installed, finish adding the rest of the fingers including the 2 that go in backwards.
8] Tighten the spinner plate bolt to install the plate. You might want to make a trip to the hardware store and get all 5 bolts out of stainless or at least new but ours looked really good after 5 years and I was in a hurry!
9] Install all side fingers…
10] Bring on the birds!